Showing posts with label Android. Show all posts

Saturday, December 25, 2010

Nexus S price cut affirmed, UK launch pushed on December 22nd !!

blogged by GmyDotCom

The launch hype for the Gingerbread flagship will obviously lure in buyers, and this makes Carphone Warehouse and BestBuy UK to bumped back Nexus S retail debut on December 22nd. Notably, the confirmed price cut even makes the launch interesting.

Android to Dominate 39% of Tablet Market by 2012 !!

blogged by GmyDotCom

The end is near, it's 2012, yes, the end is near for Apple's iPad established kingdom on the tablet computer market.
 
According from the analysts of Piper Jaffray, Android has a very strong chance of dethroning the iPad and takes a healthy portion of its share in the tablet market up to 39 percent.

Samsung Galaxy S sells 9.3M units near 10M target !!

blogged by GmyDotCom

This 9.3 million Galaxy S sales was really the number we're looking at compared to Microsoft's 1.5 million Windows Phone 7 units sold on retailers and operators.
 
The good news here is that Samsung is almost on its targeted 10 million sales from its announced goal two months ago for its Android-loving superphone.

Friday, December 24, 2010

Samsung Galaxy Tab Review !!

blogged by GmyDotCom

Let’s just get it out of the way: the Samsung Galaxy Tab is the first Android tablet worth anyone’s money. It really is, but whether or not you should spend the money on it is the real question. With a 7-inch screen, 1GHz Hummingbird processor, front and rear cameras, the Galaxy Tab promises a lot, and for the most part delivers.

The Galaxy Tab has one goal alone, and that is to prove that Android 2.2 functions on a tablet despite what Google says. OK, it also has the goal of dethroning the iPad as the go-to tab on the market, but frankly that just isn’t happening. The Galaxy Tab excels as a web viewer and eReader, and media and gaming on the slate work out pretty smoothly. Under low use the battery lasts quite a while, but heavy use will see it drain steadily and surely. The size is just right for portability, but ends up feeling a bit constricted.

While my time with the Galaxy Tab often had me saying “oh, I could really use this,” I found that I hardly ever felt a desire to pick the thing up other than forcing myself to. Perhaps its that I’m not in the habit of having a tablet device in my arsenal of tech, but just maybe it’s because the Tab doesn’t fill the void between the smartphone and laptop as well as it could.

World’s Largest Nexus S !!

blogged by GmyDotCom

A Best Buy down in San Carlos, California is hosting the worlds largest Nexus S. While it’s really a big screen hooked up to a normal Nexus S, the touchscreen is fully functional, albeit a little terrible. Don’t expect to be able to carry this one around in your pocket, or in hand for that matter; the screen is a whopping 42 inches, diagonally.

Tech Crunch went on a road trip to record some video of it in action. Paper Toss, Google Maps, the Market and jury-rigged front facing Camera are demonstrated.

Wednesday, December 22, 2010

How to Install APK files on your Android Phone !! (2/2)

blogged by GmyDotCom

Android is one of the most promising mobile platforms currently available on the market. More than 100 new Android smartphones are expected in the coming year.

Using the Android SDK

There is one more method that can be used, you can install APK files into your phone using the Android SDK. Download the Android SDK.

First of all, install the Android SDK on your computer. You will also need to install the Android USB drivers to connect the SDK to your phone via USB. You can download it from here - http://dl.google.com/android/android_usb_windows.zip .

To install applications from other sources, you also need go to Settings -> Application Settings and enable Unknown Sources. Also go to Settings -> SD Card and Phone Storage -> Disable Use for USB Storage. You can enable it again later.

Next, just open Command Prompt and type: adb install path/file.apk

where path is the full path to the APK file and file is the name of the APK application file. Your application is now installed. This is all you need to do, now just open the application on your phone and use it.

How to Install APK files on your Android Phone !! (1/2)

blogged by GmyDotCom

Android is one of the most promising mobile platforms currently available on the market. More than 100 new Android smartphones are expected in the coming year.


Through the Android Market

To install APK applications on your Android phone do the following:

Copy the APK file you want to install to your phone's memory card and insert the card into your Android phone.
 
Go to Android Market and search for the Apps Installer application.
 
Open it and click on the Install button.
 
After it is installed, just open it. It will show you all the APK files stored 

directly in the root directory of your memory card.
 
Just click on the application you want to install and it will be installed.

Five Great Reasons to Root Your Android Phone!! (5/5)

blogged by GmyDotCom

Bonus apps and widgets from other builds


G1 users don't get the same built-in apps as myTouch owners, and myTouch fans can't grab all the neat stuff from the HTC Hero, not yet available in the U.S., or the Android Donut build not yet distributed by carriers. 


That's a strange condition for a phone built on openness. Cyanogen and other custom ROMs cherry-pick those neat exclusives and deliver them to anyone who wants them. 

The best of the pack, from a phone use standpoint, is the Power Control widget, which turns Wi-Fi, Bluetooth, GPS, data syncing, and screen brightness into simple toggles. Those bemoaning the lack of Microsoft Exchange support on G1s should check out Work Email, and anyone needing to do a little doc browsing can get it done with Quickoffice and PDF Viewer. 

There are other software goodies to geek out over—a full terminal emulator!—but those are the highlights.

Five Great Reasons to Root Your Android Phone!! (4/5)

blogged by GmyDotCom

Multi-touch browsing


It's not as responsive as the iPhone's iconic pinch and expand capabilities, and the browser isn't as good at adjusting the page to meet your rapid zoom demands. 

That said, most folks would rather press their fingers once to get a bigger view on text than tap once, click + and - buttons to get the right zoom, then re-adjust their screen position. 

Until Google decides to go ahead and look away from Apple's patents, we can just hope that unofficial multitouch improves from version to version.

Five Great Reasons to Root Your Android Phone!! (3/5)

blogged by GmyDotCom

A better keyboard

 
The standard Android keyboard has its issues, and leading Android phone maker HTC knows it. They made their own keyboard for the HTC Hero, and the CyanogenMOD makes it available in any Android phone. 

Enable it by heading to Settings, Locale & Text, then turning "Touch Input" on and adjusting its spell/suggest/feedback settings. "Better" is this editor's own opinion, though Matt Buchanan from Gizmodo agrees: 

The keys are "puffed up" and easier to hit, the "long press" is faster than reaching for an Alt key, once you're used to it, and the auto suggestions and replacements are, if not subtle, generally helpful. What's definitely better is the responsiveness and snappiness, which is crucial when you're blazing through text and don't want to guess what three letters you last selected.

Five Great Reasons to Root Your Android Phone!! (2/5)

blogged by GmyDotCom

Easy tethering over Wi-Fi or Bluetooth


After installing your custom ROM, grab this android-wifi-tether app by heading to that URL directly in your Android browser (or using the Barcode Scanner app to pick up its QR code) and clicking the .apk link. 

The app will ask for root access to enable and disable itself. Once it does, that's about all there is to it. Power up your laptop, connect it by Wi-Fi or Bluetooth to G1Tether (or your similarly-named ad-hoc phone connection), and you've got a data connection where none might have existed before. 

It will be slower than you anticipate, useful mainly for text-based email and browsing, and not something you'd want to use heavily, lest you tip off your cellular provider to your creativity. That said, it's not restricted to web traffic only, like previously mentioned PdaNet, and it's easy to use.

Five Great Reasons to Root Your Android Phone!! (1/5)

blogged by GmyDotCom

A real performance boost


Android, as an alternative, open-source smartphone OS, is pure geek bait, but the hardware it's been officially released onto so far, in the U.S. at least, has been hard to love. 

Pushing a button and having to wait even just a second or two for something, anything to happen is a buzz kill; having to wait a second for a virtual keyboard press to show up is just plain aggravating. 

Using the CyanogenMOD ROM on G1, it's definitely a better experience—not perfect and instant, but the phone seems to be actively trying to do what we want now. New browser windows snap open, the multi-part home screen doesn't lag when swiping between screens, the top "window shade" and bottom app menu don't hesitate to show what they've got—I've been using this phone for just a few months, but could go on and on. 

Cyanogen's developer himself notes that his ROM actively works the processor, RAM, and memory partitions harder, so you may get (even) less battery longevity from your phone. Having spent a late night and excited morning with this ROM will gladly pack a recharging cord and accept the trade-off.

How To Load a Custom ROM on the HTC Legend !!


blogged by GmyDotCom

I. Before You Begin

You MUST have done our How To Root the HTC Legend. If you haven’t, go do it and then come back here to continue.
 
II. Download the ROM You Want
Goto our HTC Legend ROMs section on our site and choose from the ROMs there. Download the one you want and save it to your computer (do NOT extract it, leave it as a .zip).

Plug your phone in via USB cable and mount the sd card so we can transfer files to it.

Copy the ROM .zip file to the root of your sdcard (NOT in any folders just on the sd card itself).

Now, turn the phone off and turn it back on by holding down Volume Down and Power until the Bootloader mode comes up.

Using the volume buttons and power to select, navigate and choose Recovery. The phone should reboot to a ! screen. (The phone should still be plugged in to the computer right now).

Now, on the computer open the Legend Root folder you extracted in the How To Root the Legend procedure and double click the “‘recovery-windows.bat” file and wait for your phone to boot into a recovery menu.

In the recovery menu on your phone, navigate using the trackpad to Wipe and click it. Then click Wipe data/factory reset.

Once it is done wiping, click Volume Down to go back to the main menu and now select Flash zip from sdcard and choose the .zip file you downloaded and saved to your sd card just now.

Once it is done flashing, select Reboot and your all set! You are now running your custom ROM. Enjoy!

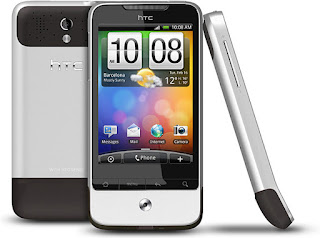
How To Root the HTC Legend !! HTC Legend !!

blogged by GmyDotCom

I. Before You Begin

YOU MUST BE ON VERSION 1.31 IN ORDER TO ROOT THE LEGEND, IF YOU ARE NOT YOU CAN DOWNGRADE USING THIS PROCEDURE.

This will erase all the data on your phone so please at least sync your contacts with Google before continuing.

You must have HTC Sync version 2.0.33, not a newer version. Uninstall HTC Sync and install this version instead.

II. Create a Goldcard
Do our How To Create a Goldcard procedure and create a goldcard for your phone. Once you have it created, put the goldcard into the phone and come back to this procedure and continue.

III. Flash the Rooted ROM
Download the Rooting Tools

Legend Rooting Tools

Unzip them to the C: drive on your computer (so the file path is C:\r4-legend-root\)

Turn off your phone and turn it back on by holding down Back and Power until you see Fastboot come up on the screen. Push the Power button while highlighting Fastboot on the phone and Fastboot should show up in red now on the phone (if it doesn’t push Power again until it does).

Plug the phone in via USB cable to the computer.

Open the folder you extracted to the C drive and double click “step1-windows.bat” and wait for it to finish.

Once you see the menu on the phone come back up, navigate to BOOTLOADER and push power, then navigate to RECOVERY using the volume buttons to navigate and the power button to select and the phone should boot to the ! screen.

Now on the computer double click the “step2-windows.bat” file and wait for it to finish. (UPDATE 12.13.10 – You MUST have HTC Sync version 2.0.33 not a newer version for step2 to work. Please uninstall HTC Sync and download and install this version instead, unplug then plug your phone back in, then rerun step2-windows.bat).

Now you should see a custom recovery screen, using the optical trackpad navigate to Wipe and push on the trackpad to select it. Then navigate to Wipe data/factory reset and select that.

Once that is done, push volume down to go back to the main menu and select Flash zip from sdcard and select the rootedupdate.zip file and wait for it to flash. All done, you have root access and can use any root required app! Enjoy!

How To Set Up ADB/USB Drivers for Android Devices!! (4/4)

blogged by GmyDotCom

Some Common ADB/Fastboot Commands


ADB Commands
adb devices – lists which devices are currently attached to your computer
adb install <packagename.apk> – lets you install an Android application on your phone
 
adb remount – Remounts your system in write mode – this lets you alter system files on your phone using ADB
 
adb push <localfile> <location on your phone> – lets you upload files to your phones filesystem
 
adb pull <location on your phone> <localfile> – lets you download files off your phones filesystem
 
adb logcat – starts dumping debugging information from your handset to the 
console – useful for debugging your apps
 
adb shell <command> – drops you into a basic linux command shell on your phone with no parameters, or lets you run commands directly

adb devices – lists which devices are currently attached to your computer

adb install <packagename.apk> – lets you install an Android application on your phone

adb remount – Remounts your system in write mode – this lets you alter system files on your phone using ADB

adb push <localfile> <location on your phone> – lets you upload files to your phones filesystem

adb pull <location on your phone> <localfile> – lets you download files off your phones filesystem

adb logcat – starts dumping debugging information from your handset to the console – useful for debugging your apps

adb shell <command> – drops you into a basic linux command shell on your phone with no parameters, or lets you run commands directly.

How To Set Up ADB/USB Drivers for Android Devices!! (3/4)

blogged by GmyDotCom

(Optional) Reinstall Drivers

Download USBDeview

USBDeview

While the phone is still plugged in, open USBDeview and sort by manufacturer. Find all the HTC drivers and delete them all.

Once all have been deleted, unplug the phone from the USB cable and plug it back in.

The correct drivers should reinstall automatically (check the drivers as they are installing, one should say ADB Device driver).

To check, goto Devices (or Device Manager for older versions of Windows) in your Start menu then click on the “Android Phone”. Click on the Hardware tab, and check the list of drivers for ADB Interface under Type.

How To Set Up ADB/USB Drivers for Android Devices!! (2/4)

blogged by GmyDotCom

IF DRIVERS JUST WON’T AUTOMATICALLY INSTALL, DO IT MANUALLY HERE (UPDATED 10/22/10)


A program called PDANet (used normally to allow you to wired tether your phone’s internet to your computer) can be used to install the ADB drivers for a lot of phones. Download it and follow it’s instructions to install it and see if that gets you the serial number (if you do, you are all done). If not, then use one of the device specific programs in below.

PDANet

Download your phone’s driver’s below then goto your Device Manager on your computer, look for the phone and click on it. Then click Properties > Update Driver > Browse > Let me pick > Computer > Have Disk > Browse > Then select the driver you downloaded below:

Universal Motorola Drivers (unzip the file once you download it, and run the program inside to install the drivers)(Updated 09.27.10)

Motorola Droid Drivers (unzip the file once you download it).

Motorola Milestone Drivers (follow the instructions on the page).

Motorola CLIQ Drivers (follow the instructions on the page).

Nexus One Drivers (unzip the file once you download it).

Samsung Behold 2 Drivers (unzip the file, run the setup.exe) (If you have Windows 64Bit, you CANNOT install the Behold Drivers. Find someone with a 32Bit system to to any Behold 2 procedures involving ADB).

Samsung Galaxy Drivers (unzip the file, do NOT run setup.exe. Instead follow step 1 in Section II and install manually.)
Samsung Galaxy Fastboot Drivers
(unzip the file, then when you plug the phone in via fastboot mode, select to install drivers manually and choose the folder you just unzipped and it should install them from there).

How To Set Up ADB/USB Drivers for Android Devices!! (1/4)

blogged by GmyDotCom
Setting Up The SDK
Download the Latest Android SDK from Google

Android SDK

Extract the Android SDK .Zip file to C:\AndroidSDK (this should name the new folder created AndroidSDK in the C directory.

On your phone, click Settings > Applications > Development and make sure USB Debugging is on.

Plug your phone into your computer via USB cable (it needs to be on). It should say installing drivers if using Windows.

!UPDATE 12.01.09 – If using Windows 7 skip steps 4 and 5 and use this procedure instead.

After it installs the drivers, goto the Start menu and type cmd into the search bar (Vista or higher) or click Run then type in cmd (XP) to open the command prompt.

Type the following into the command prompt window (hitting enter at the end of every line):

cd\
cd AndroidSDK\tools\
adb devices

UPDATE: If it says adb not found or something similar, download the ADB files and extract them into the Tools folder of the SDK (they were taken out by Google in the R08 version for some reason and need to be put back).

You should see a serial number pop up, it’s the serial number of your phone. This means you are all set.

If you do NOT see a serial number, then we need to reinstall the drivers.

How To Create a Goldcard !! HTC Legend !!

blogged by GmyDotComBefore You Begin
Some memory cards simply will not let you edit them in the way we are about to, so you may need to do this procedure and if it doesn’t work, try a new memory card. 2GB Kingston SD card DOES work for sure so up to you if you want to just buy one of those before beginning.

YOU WILL NEED AN SD ADAPTER! This can be a MicroSD to USB that allows you to plug the SD card into your computer’s USB port OR a MicroSD to SD adapter if you have a SD port on your computer.

 
II. Setup ADB
Follow these instructions (with video) to setup ADB for your phone, then come back to this procedure to continue.

III. Create a Goldcard
Put the memory card you want to use for the GoldCard into your phone.

With the memory card in your phone, click on Settings, SD and Phone storage, then click Unmount SD card. Once it unmounts, click Format SD card. (Please keep in mind that some memory cards don’t work, and this will erase all data on your SD Card so back all the data up first to your computer)

On the Phone, goto Settings, Applications, Development and then make sure USB Debugging is checked.

*Make sure you have installed the SDK and Fastboot correctly from Section I!!!
Plug the phone into the computer and then open the Command Prompt (goto the start menu and type in cmd in the search box). Then type the following with hitting enter at the end of each line.

cd\
cd\AndroidSDK\tools\
adb devices

(wait for it to show a serial number underneath, if it doesn’t then reinstall the drivers from section I).

Then type:
adb shell cat /sys/class/mmc_host/mmc1/mmc1:*/cid (There is no spaces in this line EXCEPT right after the word cat in the beginning, make sure to put that space in)

A code will display, write the code down (MAKE SURE TO WRITE IT DOWN EXACTLY!)

Goto this site, http://hexrev.soaa.me/, (thanks to Soaa for the reverser!) then put in your code you just wrote down into the text box and click submit. It will generate the code reversed and replace the first two digits with zeros automatically. Write that down and continue.

Now, on your computer, goto http://psas.revskills.de/?q=goldcard and enter your email in the appropriate field and for CID enter the reversed CID you just copied down BUT REPLACE THE FIRST 2 DIGITS WITH 2 ZEROS! (i.e. 12345678910 becomes 00345678910). *Thanks to Viper for providing these Goldcards for FREE!

Click continue and then you will receive your goldcard.img via email. Once it arrives save it to your computer.

Now, goto http://download.cnet.com/HxD-Hex-Editor/3000-2352-10891068.html?part=dl-HxDHexEdi&subj=uo&tag=button to download the HxD Hex Editor. Save it and install it to your computer.

Take your SD card out of your phone and put it into the SD adapter it came with. Then put that into your computer so it shows up on your computer as Removable Disk.

Open the Hex Editor (Run as Administrator if one Vista or Windows 7) and click on the Extra tab, then click on Open Disk. Under Physical Disk select Removable Disk (your SD card you just put into the computer). Make sure to UNcheck “Open as ReadOnly”. Click OK.

Goto the Extra tab again and click Open Disk Image. Open up the goldcard.img that you saved from your email. You should now have two tabs, one is the SD card (Removable Disk) and the other is the goldcard.img. Press OK when prompted for Sector Size 512 (Hard Disks/Floppy Disks).

Click on the Goldcard.img tab and click on the Edit tab and click Select All. Then click on the Edit tab again and click Copy.

Click on the Removable Disk tab (Your SD Card) and select offset 00000000 to 00000170 then click on the Edit tab and click Paste Write.

Click on File then click Save.

Close the Hex Editor.

Test what we’ve done:

Take out the memory card from the computer, then put it back in.
Try to open the memory card on the computer (Removable Disk), if it lets you, you are all set. If it asks/tells you to reformat the card, then try steps 13 – 19 again. If it gives you the same error again, then try a different memory card (Erlern said it didn’t work for him until he finally went and bought a Kingston 2GB card, then it worked on that card).

You can now use this goldcard to root phones that were previously unrootable!

Good Luck !!

Tuesday, December 21, 2010

What is Android?

blogged by GmyDotCom

Android is a mobile operating system initially developed by Android Inc. Android was purchased by Google in 2005.Android is based upon a modified version of the Linux kernel. 

Google and other members of the Open Handset Alliance collaborated to develop and release Android to the world.The Android Open Source Project (AOSP) is tasked with the maintenance and further development of Android.Unit sales for Android OS smartphones ranked first among all smartphone OS handsets sold in the U.S. in the second and third quarters of 2010,with a third quarter market share of 43.6%.

Android has a large community of developers writing application programs ("apps") that extend the functionality of the devices. There are currently over 100,000 apps available for Android. 

Android Market is the online app store run by Google, though apps can be downloaded from third party sites (except on AT&T, which disallows this). Developers write in the Java language, controlling the device via Google-developed Java libraries.

The unveiling of the Android distribution on 5 November 2007 was announced with the founding of the Open Handset Alliance, a consortium of 79 hardware, software, and telecom companies devoted to advancing open standards for mobile devices. 

Google released most of the Android code under the Apache License, a free software and open source license.

The Android operating system software stack consists of Java applications running on a Java based object oriented application framework on top of Java core libraries running on a Dalvik virtual machine featuring JIT compilation. 

Libraries written in C include the surface manager, OpenCore media framework, SQLitedatabase management system, OpenGL ES 2.0 3D graphics API, WebKit layout engine, SGL graphics engine, SSL, and Bionic libc. The Android operating system consists of 12 million lines of code including 3 million lines of XML, 2.8 million lines of C, 2.1 million lines of Java, and 1.75 million lines of C++. relational